Hardware
A prerequisite for this tutorial is to have a functioning raspberry pi with the micro sd card in it and running an operating system. Instructions for getting that up and running are outside the scope of this tutorial. The Raspberry Pi Foundation website has a guide called "Getting Started with NOOBS" (Raspberry Pi Foundation, 2014).
Another prerequesite for the OSHIOT Door Counter is to have a computer handy so you can monitor the Ubidots dashboard.
To set up the hardware for this project you will need to plug your raspberry pi into a monitor, keyboard, mouse, and power source.
If you have an older Raspberry Pi (version 2 or earlier) you will need to attach a wi-fi dongle. The Raspberry Pi 3 comes with built in wifi.
No matter which type of Raspberry Pi you are using, you will need to plug in the Passive Infra Red (PIR) sensor to the pins on the Raspberry Pi.
After you are done setting up and testing your OSHIOT Door Counter, you can put it into a case. Below are instructions for assembling your OSHIOT Door Counter with details about each item.
If you need to find out where to purchase any of these parts, you can consult the Bill of Materials (BOM) page.
Power
The Raspberry Pi accepts power through its micro USB port. You can get power to the Raspberry pi by plugging it into a computer's USB port or a 5 volt Alternating Current (AC) adapter plugged into a standard U.S. household 120v wall outlet. If you would like more description about the different types of wall outlets in the United States, check out this Home Depot reference guide with photos http://www.homedepot.com/c/electrical_outlets_factors_to_consider_when_selecting_electrical_outlets_HT_BG_EL .
Monitor
The default monitor port for the raspberry pi is the High Definition Media Interface (HDMI port), so you will need an HDMI cable and a monitor with an HDMI input. If you are using a computer monitor or tv with HDMI input then the Raspberry Pi will probably display with no trouble as soon as you plug it in. However, there are some monitors which require additional configuration in the Raspberry Pi's boot/config.txt file. See this product page for an example https://learn.adafruit.com/adafruit-5-800x480-tft-hdmi-monitor-touchscreen-backpack/raspberry-pi-config.
Wi-Fi
The Raspberry Pi 3 comes with wifi built in.
If you are using a Raspberry Pi 2, you will need to get a wifi dongle that plugs into one of the Raspberry Pi's USB ports.
If you have issues with the wifi dropping out, you may need to turn off power management. Here is a guide on how to do that https://learn.adafruit.com/adafruits-raspberry-pi-lesson-3-network-setup/test-and-configure#fixing-wifi-dropout-issues.
PIR Sensor
Passive Infra Red (PIR) sensors detect changes in a type of light that is not visible to the naked eye. PIR sensors make good motion detectors because they ignore changes in ambient light such as when a cloud passes in front of the sun. PIR sensors detect changes in light made by people and animals passing in front of it. More information about how PIR sensors work is available at this link https://www.tweaking4all.com/hardware/pir-sensor/.
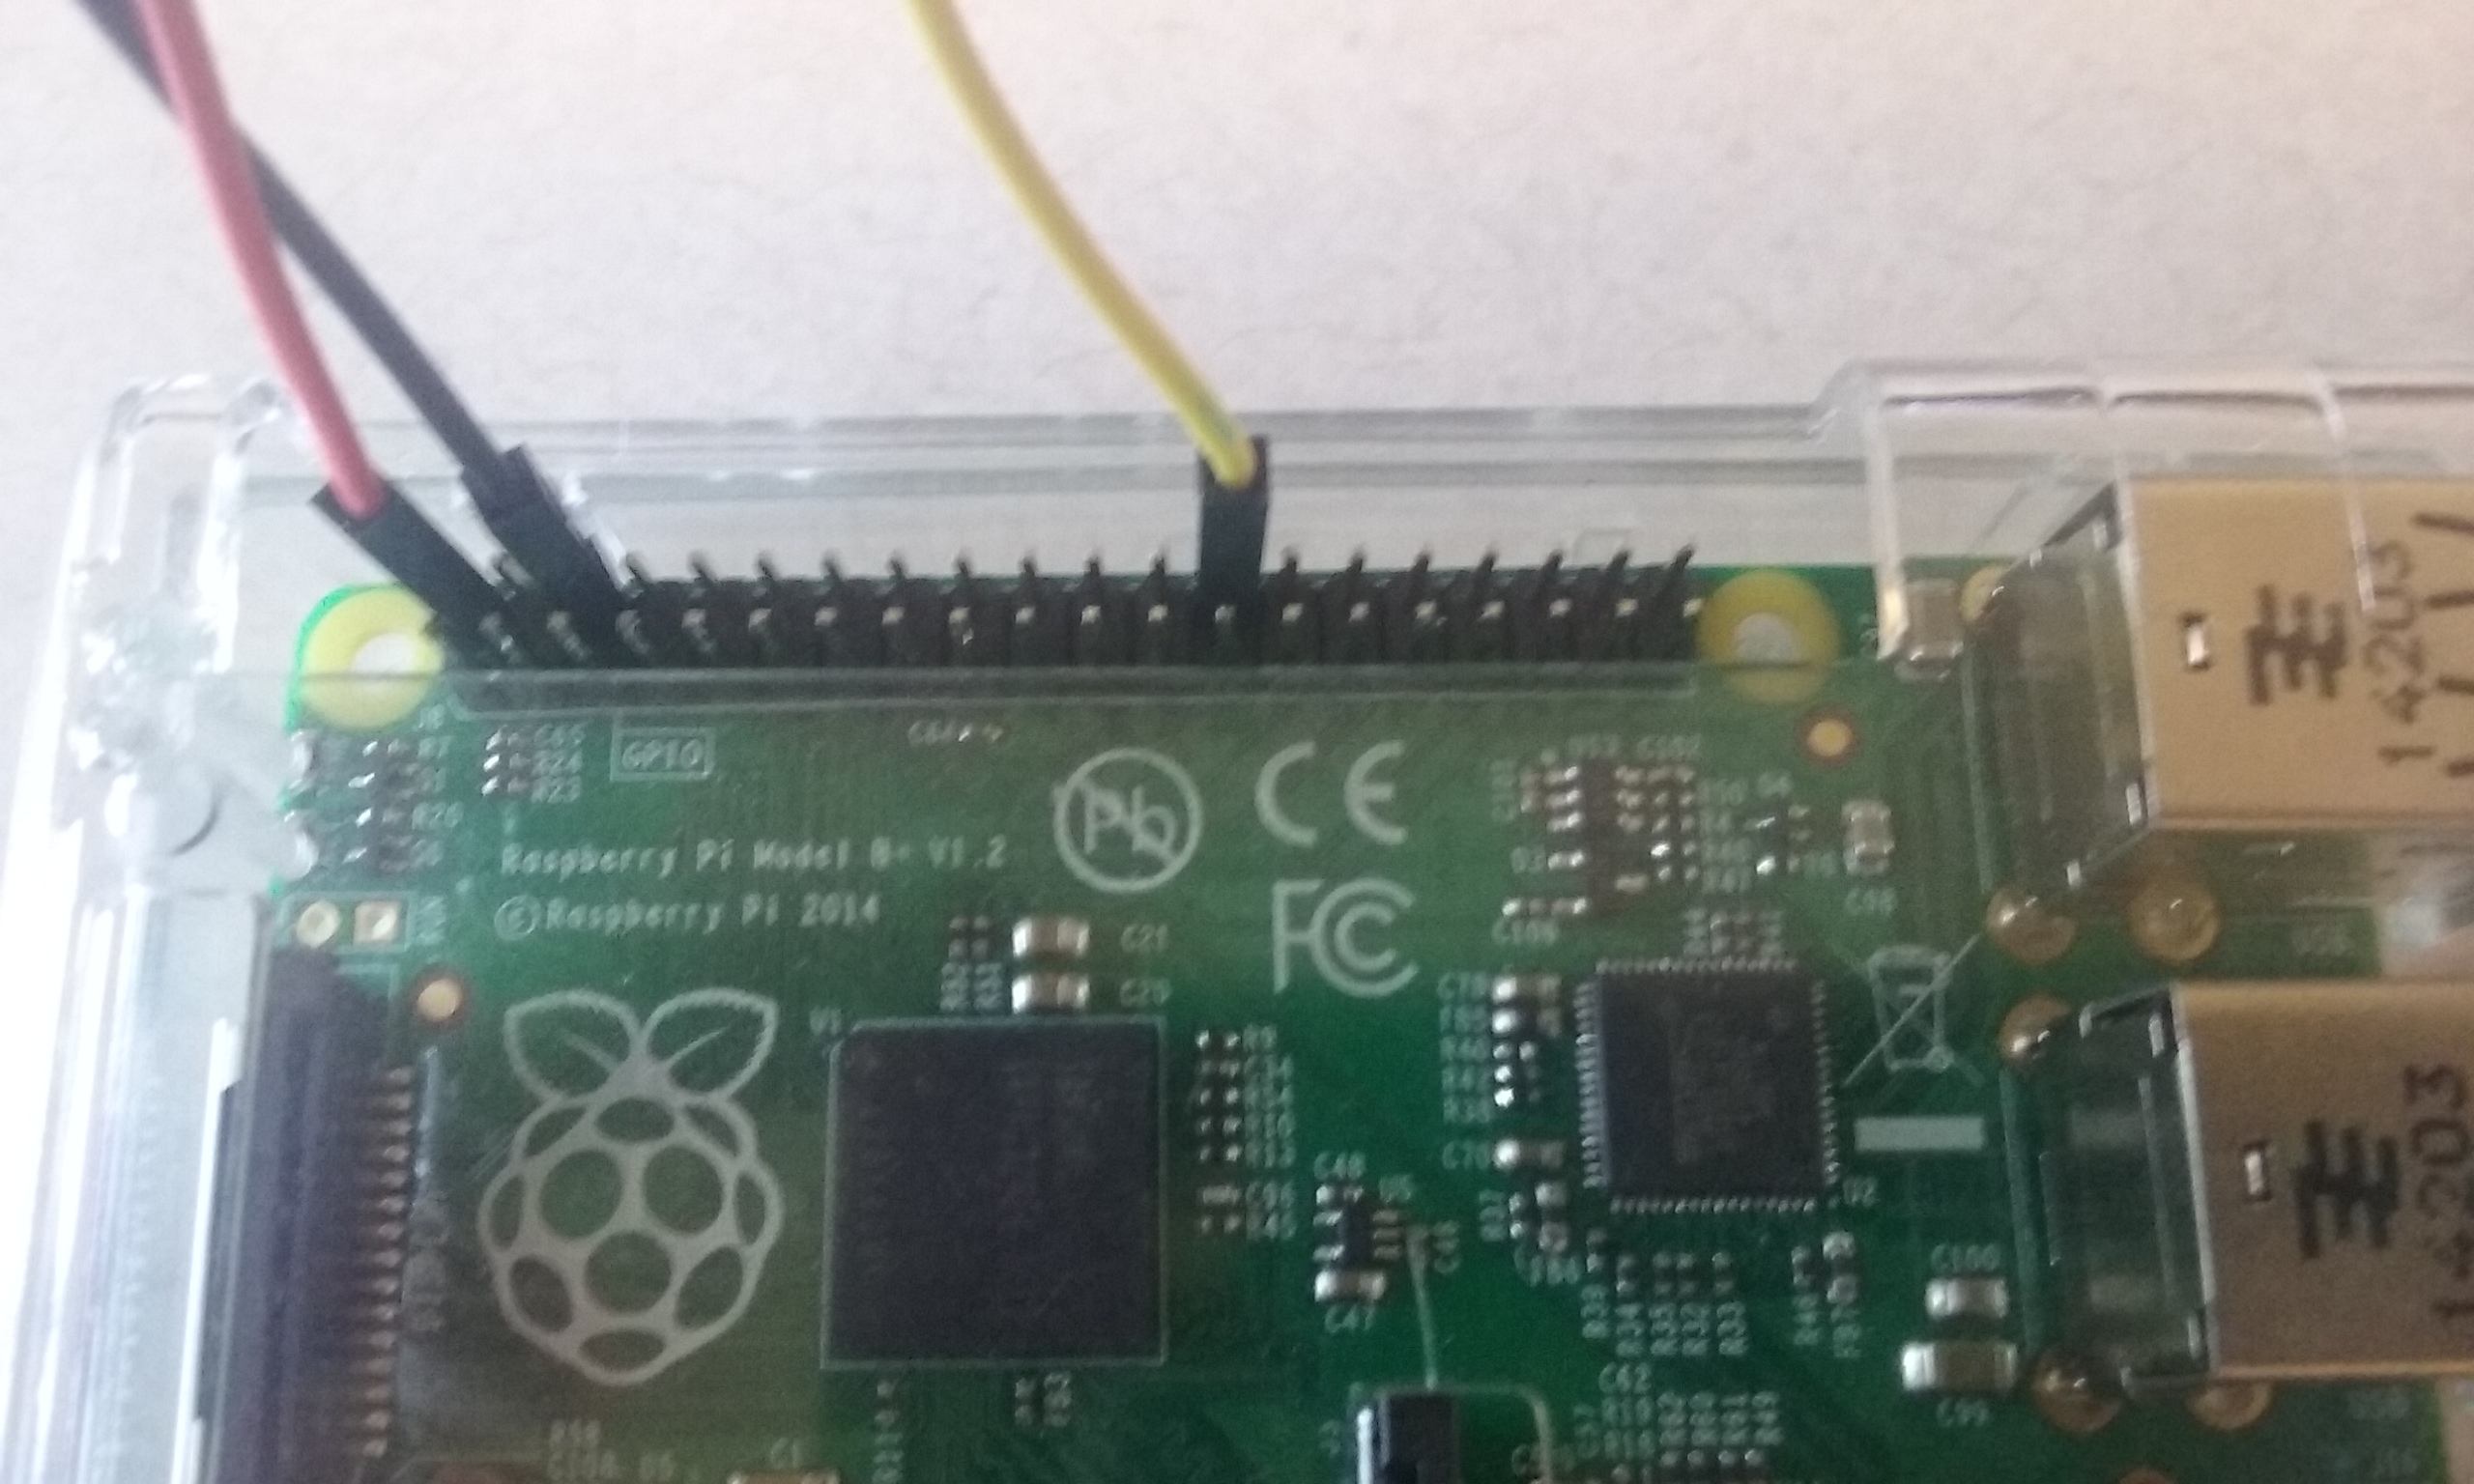
Attach the PIR sensor to the Raspberry Pi. The PIR has three wires: power, ground, and data. Power is red, ground is black, and data is yellow. The software will specify which pin it expects to receive data from, so make sure your wires are attached like the photo below. If you want more information about how General Purpose In Out Pins (GPIO) are numbered, you can consult this explanation https://raspberrypi.stackexchange.com/questions/12966/what-is-the-difference-between-board-and-bcm-for-gpio-pin-numbering.

Case
When you are done setting up your People Counter and you have completed any necessary troubleshooting, you will enclose it in the case.